Aperture and ISO - Workshop
Aperture is the opening in the lens, it is the size of the hole that opens when you hit the shutter button. The bigger the hole the more light is let back onto the sensor so the higher the aperture, the smaller the hole the less light is let through. The size of the hole is measure by F-stops, this is from low F-stops with a larger opening to a high F-stops with a smaller opening letting light in.
Depth of field is the space of the image that will be in focus, for example if you have a large depth of field then most of your image will be in focus including the sections close and far away from the camera you are using. When using aperture it effects your depth of field as the larger your aperture the smaller you depth of field, and the smaller you aperture the larger your depth of field. So if you wanted an image that is all in focus you would have to have your aperture setting on, for example, f/32.
Aperture also affects exposure because if you have a high aperture, for example f/5, it has a larger opening to allow the light to high the imaging sensor. This therefore creates a high amount of exposure within the image you are creating. Where as if you had a low aperture, for example f/32, the opening to allow light through is smaller therefore creating a low amount of exposure within the image.
ISO is the measurement of how sensitive the cameras sensor is, so the lower the number of ISO the lower the sensitivity to light. Adjusting the ISO setting higher would make it more sensitive to light and have a grainier image produced. This would also change the image because it would impact the aperture and shutter speed, it would impact it by allowing you to take photos with a higher shutter speed and smaller apertures.
This can be useful for a variety of different photography applications, such as landscape and portrait. This is because it allows you to completely focus on your subject or object and you can either blur the background out or also focus on the background. In portrait photos it allows you to make the subject completely focused upon, while also making the image bright or darker depending on what you desire from your camera settings. It would especially be useful in landscape photography as using a small aperture setting allows the camera to have a large depth of field, allowing the photographers to capture an image where the whole photo is focused upon. However this can also mean that the image isn't as bright as it could be, this is why landscape photographers tend to have a long shutter speed so that it lets in more light over the time.
Workshop Task -
For this workshop we were using the different aperture settings and ISO settings on the camera to see what they would do to the image. The camera we used was a Sony DSLR-A290, with the setting on aperture priority. We had the camera set up on a tripod while we took the images we needed.
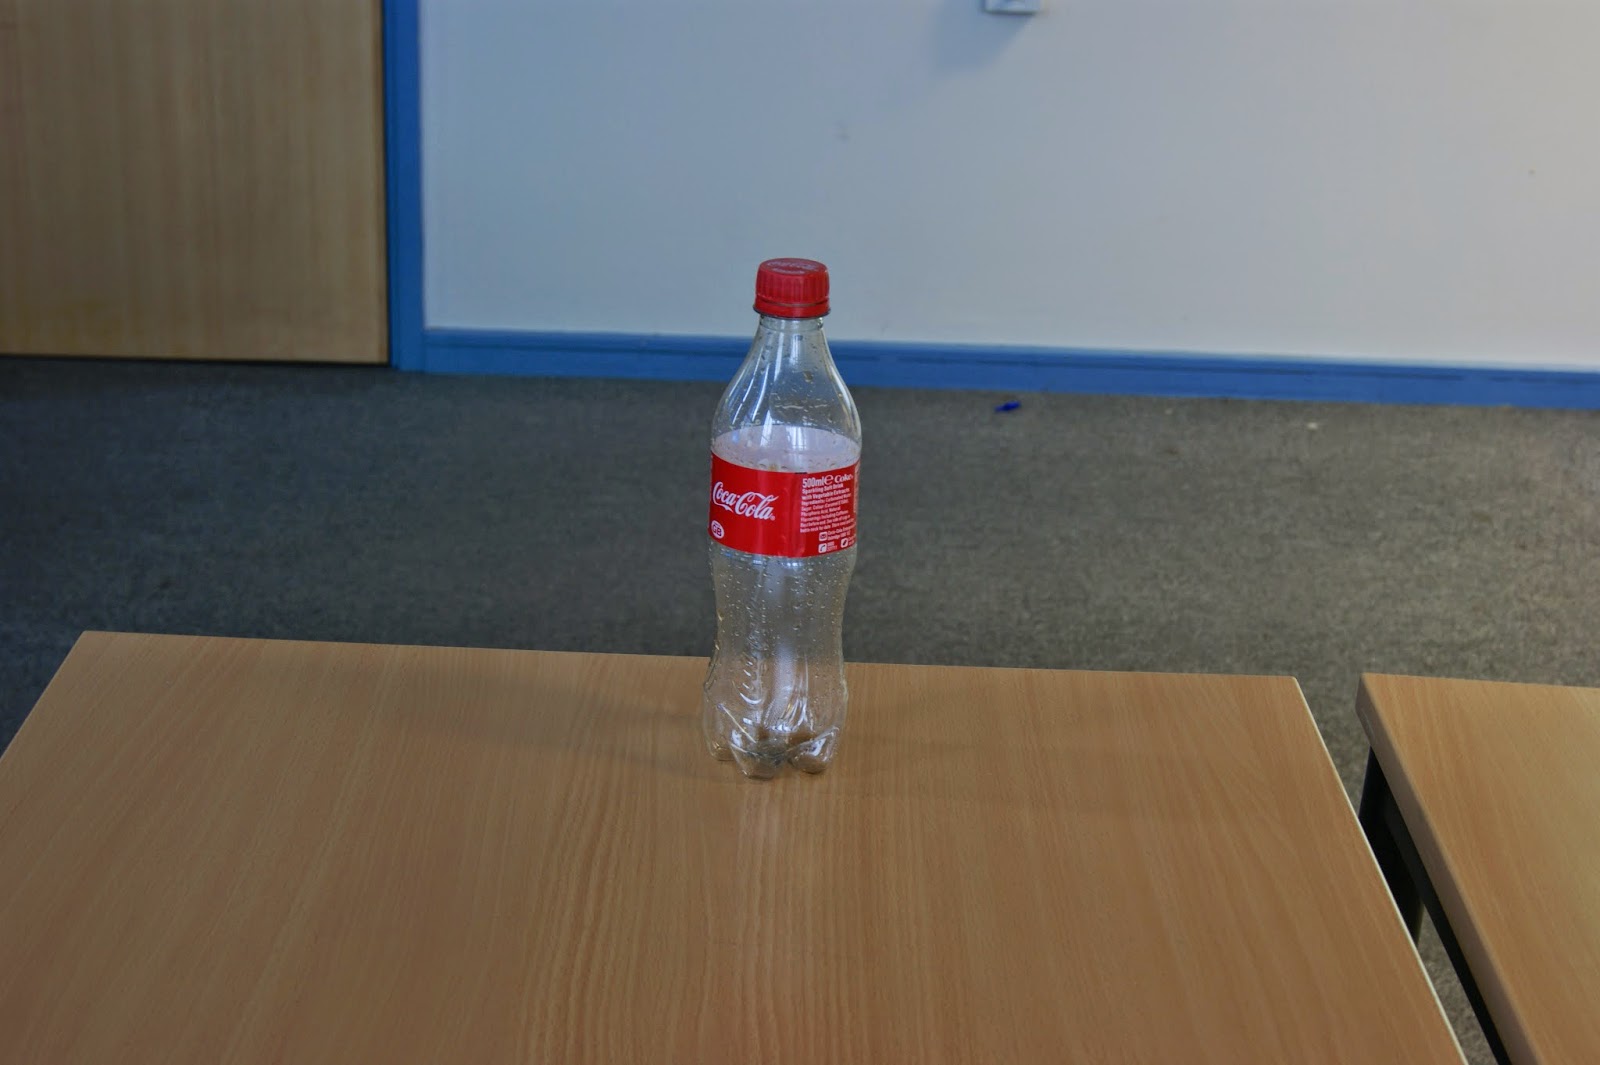
f/5
1/60sec
ISO-3200
This aperture setting was quite high, however as the shutter speed setting wasn't too high it let in some light but not for too long. ISO setting was also quite high but as we took the image indoors and the lighting wasn't too bright the image has come out with a neutral lighting. With this image you can see how it has effected the depth of field, as the bottle is completely in focus but the background is quite blurry.
f/8
1/30sec
ISO-3200
This aperture setting was a bit lower than the image above, however as the shutter speed setting was quicker it let in some light but not for too long. ISO setting was also quite high but as we took the image indoors and the lighting wasn't too bright the image has come out with a neutral lighting. With this image you can see how it has effected the depth of field, as the bottle is completely in focus but the background is still quite blurry.
f/13
1/13sec
ISO-3200
This aperture setting was a bit lower than the image above, however as the shutter speed setting was quicker it let in some light but not for too long. ISO setting was also quite high but as we took the image indoors and the lighting wasn't too bright the image has come out with a neutral lighting. With this image you can see how it has effected the depth of field, as the bottle is completely in focus with the background a little blurry but also becoming more in focus.
f/22
1/4sec
ISO-3200
This aperture setting was a bit lower than the image above, however as the shutter speed setting was quicker it let in some light but not for too long. ISO setting was also quite high but as we took the image indoors and the lighting wasn't too bright the image has come out with a neutral lighting. With this image you can see how it has effected the depth of field, as now the bottle and the background is both in focus.
We then, at a further distance away, tested the aperture settings again. This time we had a lower ISO to show how that also can effect the images.
f/5
1/4sec
ISO-100
This aperture setting was quite high, however as the shutter speed setting wasn't too high it let in some light but not for too long. The ISO setting was quite low but as we took the image indoors and the lighting wasn't too bright the image has come out with a slightly darker tone. With this image you can see how it has effected the depth of field, as the bottle is completely in focus but the background is quite blurry.
f/8
1/2sec
ISO-100
This aperture setting was a bit lower than the image above, however as the shutter speed setting was quicker it let in some light but not for too long. The ISO setting was quite low but as we took the image indoors and the lighting wasn't too bright the image has come out with a slightly darker tone. With this image you can see how it has effected the depth of field, as the bottle is completely in focus but the background is still quite blurry.
f/13
0.8sec
ISO-100
This aperture setting was a bit lower than the image above, however as the shutter speed setting was quicker it let in some light but not for too long. The ISO setting was quite low but as we took the image indoors and the lighting wasn't too bright the image has come out with a slightly darker tone. With this image you can see how it has effected the depth of field, as the bottle is completely in focus with the background a little blurry but also becoming more in focus.
f/22
1.6sec
ISO-100
This aperture setting was a bit lower than the image above, however as the shutter speed setting was quicker it let in some light but not for too long. The ISO setting was quite low but as we took the image indoors and the lighting wasn't too bright the image has come out with a slightly darker tone. With this image you can see how it has effected the depth of field, as now the bottle and the background is both in focus.
We then, at a even further distance away, tested the aperture settings again. This time we had a higher ISO to show how that also can effect the images.
f/5
1/20
ISO-400
This aperture setting was quite high, however as the shutter speed setting wasn't too high it let in some light but not for too long. The ISO setting was higher than at the last distance but as we took the image indoors and the lighting wasn't too bright the image has come out with a neutral lighting. With this image you can see how it has effected the depth of field, as the bottle is completely in focus but the background is quite blurry.
f/8
1/20
ISO-400
This aperture setting was a bit lower than the image above, however as the shutter speed setting was the same it let in some light but not for too long. The ISO setting was higher than at the last distance but as we took the image indoors and the lighting wasn't too bright the image has come out with a neutral lighting. With this image you can see how it has effected the depth of field, as the bottle is completely in focus but the background is still quite blurry.
f/13
1/10
ISO-400
This aperture setting was a bit lower than the image above, however as the shutter speed setting was quicker it let in some light but not for too long. The ISO setting was higher than at the last distance but as we took the image indoors and the lighting wasn't too bright the image has come out with a neutral lighting. With this image you can see how it has effected the depth of field, as the bottle is completely in focus with the background a little blurry but also becoming more in focus.
f/22
1/2
ISO-400
This aperture setting was a bit lower than the image above, however as the shutter speed setting was quicker it let in some light but not for too long. The ISO setting was higher than at the last distance but as we took the image indoors and the lighting wasn't too bright the image has come out with a neutral lighting. With this image you can see how it has effected the depth of field, as now the bottle and the background is both in focus.
As we were changing the distance to see the effect of the aperture settings, it makes it harder to see the effect that the change of ISO settings had on this task. However the lower the ISO, ie. 100, the darker the image, then the higher the ISO, i.e 3200, the brighter the image. The ISO can help make the image brighter, which is especially useful if you need to have a quick shutter speed and lower aperture. Sometimes the ISO can overexpose image or make the quality lower as it would be if the photographer had use a longer shutter speed.
 One Point Lighting
 One Point Lighting
  Two Point Lighting
 Three Point Lighting