Monday 9 March 2015

My Final 5 Images


My Final 5 Images


AO3- Task 4- The Photoshop Editing Process (Image 3)


Screenshots of photo editing process in Photoshop for Image 3


The original image:

The editing process:
For this particular image I decided to add layers in to change the colours of the image, I wanted to make the sunset colours in the background more noticeable. 

So to do this I started by changing the colours of the image to make the reds more noticeable and vivid. To do this I had to play around will all the colours to see which would make the colours that I wanted to be brighter more vivid.

Following this I managed to use this curves layer to make the trees darker, while also managing to make the grass brighter and the sky vibrant. 

This is the outcome of the editing process:

AO3- Task 4- The Photoshop Editing Process (Image 1)


Screenshots of photo editing process in Photoshop for Image 1


The Original Image

The editing process:

To create the effect I wanted on this image I decided to add different layers that change the images colours or brightness.

I started by editing the brightness and contrast of the image, I decided that to create a dark eerie outcome that I would have to make it a bit darker and make the contrast stronger and therefore more noticeable. 

Following this I then changed the hue and saturation of the image on another layer, I did this so that the image would loose the bright colours and become more eerie looking.

After changing the hue and saturation I again changed the brightness/contrast a little bit more to create the effect I wanted, and also because I found the pathway and trees to be a little too bright.

I selected to changed the specific colours as I didn't want the pathway so bright or the greens to be so vibrant, so to do this I added the layer onto the image and choose the green colour and then manipulated this magenta/cyan/yellow/black until the image finally looked and had the atmospheric outcome I intended.


Dark Version


For this bright version I again started with the brightness/contrast and made the image a lot brighter and the contrast stronger. 

Following this I then changed the hue and saturation until the colours were brighter, more vivid and there were more colours noticeable in the image.

I also decided to change the vibrancy and I wanted to create an image that was noticeably bright and made nature look almost unreal. So I changed the vibrancy setting to make the colours more vivid.

I selected to changed the specific colours as I didn't want the pathway so light or the greens to be so dull, so to do this I added the layer onto the image and choose the green colour and then manipulated this magenta/cyan/yellow/black until the image finally looked and had the bright vivid atmospheric outcome I intended.


Bright Version

This is how my finished two edited images came out:


Wednesday 4 March 2015

AO3- Task 3- Risk Assessments


Risk Assessment


AO3- Task 3- Schedule


  Schedule:


Date:
Location/s:
Activity To be Carried Out:
Equipment:
Contingency Plan:
27/01/15
College
Book out Camera equipment and Tripod ready for test shoot and photo shoots.
College card
If unable to book the equipment, move plan to the 28th.
28/01/15
Whitleigh Woods
Test Shoot - This is when I will be going to the woods to do a trial shoot and see if there are any areas or places I would like to do my actual shoot.
Camera - Fully charged with enough memory space
Tripod
If there is a problem with the weather or any other issues, I will move this plan to the 30th or 31st.
02-04/02/15
College
Reviewing Test Shoot - Continuation of blog work and AO2 work within college.
Computer
If there are any problems, continue work at home.
06/02/15
Whitleigh Woods
Photo shoot - This is when I will be going into the woods to start my photo shoot and take images I would use as my final images. This is also done so I can start my editing.
Camera - Fully charged with enough memory space
Tripod
If there is a problem with the weather or any other issues, I will move this plan to the 8th.
09-11/02/15
College
Reviewing First Photo shoot - Continuation of blog work, AO2 and AO3 work within college.
Computer
If there are any problems, continue work at home.
13/02/15
Whitleigh Woods
2nd Photo shoot - This is when I will be going into the woods for my photo shoot and take images I would use as my final images. This is to ensure I have 15 photos ready to peer review.
Camera - Fully charged with enough memory space
Tripod
If there is a problem with the weather or any other issues, I will move this plan to the 15th.
20/02/15
Whitleigh Woods
Re-shoot - This is when I will be going to the woods to retake any images that I like that are too dark or light etc. This is also when I will ensure I have the correct number of photos ready.
Camera - Fully charged with enough memory space
Tripod
If there is a problem with the weather or any other issues, I will move this plan to the 22nd.
23-25/02/15
College
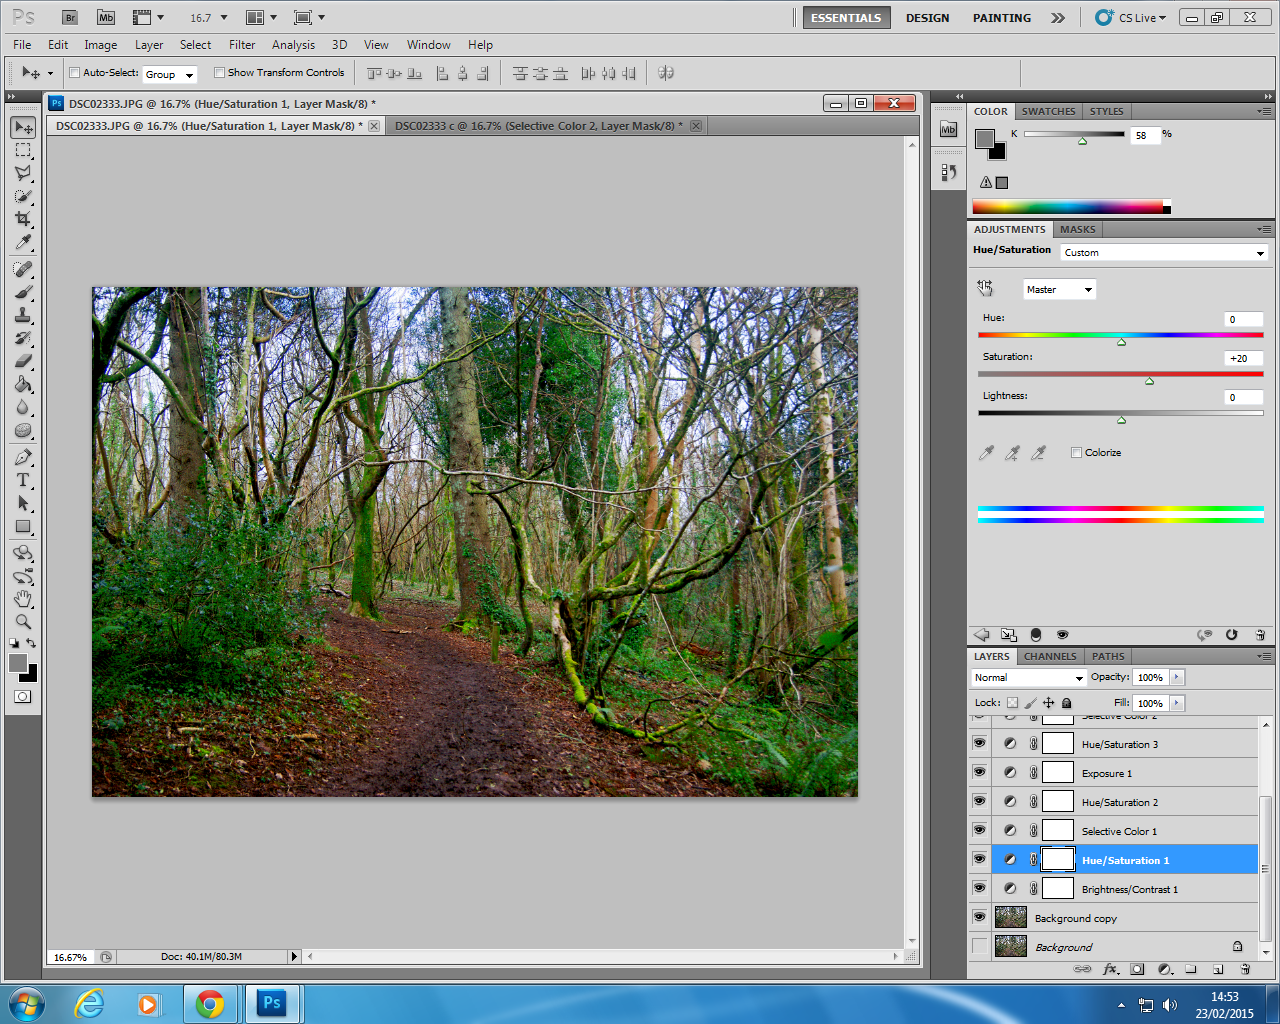
Photoshop - Photo Editing
Reviewing all photos and choosing final 15 ready for the peer reviewing the following week. Also, look through all work and ensure completed.
Computer
If there are any problems, continue work at home.
02-03/03/15
College
Peer review of final 15 photos - This is when I will show my final 15 photos to the class and get feedback until I can choose the 5 most successful photos.
Computer
If unable to compete then move plan to the following day.
04/03/15
College
Presentation of final 5 photos - This will be where I choose the final 5 images using the feedback I got, and then present those images to gain more feedback.
Computer

09-11/03/15
College
Final Selection of 2 photos - This is when I choose the most successful images.
Evaluation - This will be where I evaluate all the work I have done, including stating how I could have done better etc.
Computer
If unable to complete then finish work at home.

Sunday 1 March 2015

AO3- Task 2- Trial Shots


Trial Shots

Here are some photos from my test shoot. Most of these photos I like the idea of however they could have been photographed better. Some had lighting issues while some weren't properly in focus. However this test shoot allowed me to have places and locations where I could go back and re shoot the photos. Especially because it helped me find some places that had leading lines or parts of the woods that I could use to frame an image. This test shoot also helped as it allowed me to try and experiment with taking the photos and trying new angles to see what they would look like. 


AO3- Task 2- Mood-board


This is the mood-board I created, it includes all my ideas and thoughts about this photography task. I had chosen Landscape photography, so I looked at the types of photos that was within this application. After looking through I decided to photos that had a focus, for example the leading lines. I also liked the different colours and natural time of day atmospheres that were within all the images I was looking at.